For those of you who would like to get some insight as to how Carter creates his wonderful puzzles I have included his video demonstration and a writeup of his technique. Enjoy

From Carter Johnson:
Hi folks....I’ve had some requests to write instructions for cutting freehand, line-cut jigsaw puzzles. For those of you that are flat-out not interested, feel free to tune out now so you won’t be bored with what follows. For those of you who want to give this a try, read on. For those of you who work with complex projects, this is a pretty simple process but, if something is confusing, feel free to submit questions to me at CarterJ636@aol.com
To show you what I’m talking about, here’s a link to one of my Picture Trail albums showing different kinds of puzzles.
Gallery One
Gallery Two
So,,,,to start, here’s what you’ll need...
Pictures can be taken from almost any source, provided the paper is at least 20lb and preferably the weight of a magazine cover or greater. I take most of my pictures from calendars, cards and photos.
Blades: I use Flying Dutchman 2/0 “Superior Puzzle” blades . " Ultra Thin Puzzle Blades " (narrow kerf ) from Pegas , Shark and others also work well. To me, regular 2/0 blades cut pieces that are too loose.
Wood: All 1/4” - Probably my favorite wood is 5-ply poplar, which I get from Wildwood Designs. I also use Baltic Birch (harder to cut), oak, cherry and aromatic cedar. The poplar, for some reason, produces pieces with a tighter fit.
Glue: I use Aileen’s Tacky Glue, spread thinly and evenly with a plastic scraper. Any yellow wood glue will work almost as well. Some folks use sprays, but, to me, that’s a little messy.
Finishing spray: I use any Triple-Thick Clear Glaze. The best I’ve found is at Hobby Lobby under the brand name Crafts, Inc. (black label). Krylon makes a similar spray that is more widely available but it takes a longer time to dry. (Note: I do not spray glossy photos.)
* * * * *
Step #1 - Select picture. I deliberately select pictures that have color image lines within them that I can use as edges of pieces.
#2 - Glue to wood. Spread a thin and even coat of glue on the wood and smooth picture down slowly from one corner to its opposite. Stay close to the glued picture for 20 minutes, checking it frequently and smoothing down edges and any bubbles that appear.
#3 - When glue is dry (4+ hours), cut picture around edges. I cut a straight border if the picture has one I want to keep. Otherwise, I cut a randomly wiggly border. Don’t worry about making a mistake. You can’t!
(At this point, I take a digital picture of the puzzle. On the computer I reduce it to about 4 x 5 inches and print it out.)
#4 - Spray picture. One thick coat of the Triple-Thick Glaze is sufficient
#5 - Cut pieces, each with 2, 3 or 4 locks to adjoining pieces. I start at the upper right corner with a piece that has locks on each edge side. When you finish a piece, take it out and set it aside. When you encounter an image or color line within the picture, use its edges as the edges of puzzle pieces, remembering still to insert locking tabs.
A couple hints: a) Don’t worry about pieces not being the same size. They don’t have to be. b) Try to avoid having four pieces exactly meet at their corners. It makes the puzzle too loose.
When you’ve made 30 - 40 pieces, stop. Sand the backs of the pieces quickly either with sandpaper or with a sander held upside down in one hand while you touch the backs of pieces to it with the other. Then put those pieces together.,,,,and launch into cutting another batch....or forget it for the moment and find something else to do. You’re not running a race.
And please....please....dont use a pattern. If you want to insert certain shapes for pieces, trace those shapes when cutting them, but don’t use a pre-set pattern for the rest of the puzzle. No matter what your experience tells you, you do not need it!
#6 - When you’re finished cutting, flip the puzzle over and give the back a quick sanding. Take dust off the back and the front by flapping a damp sponge over the surfaces.
#7 - Take it apart, count the pieces, give it a name and write it down on the front of a baggie to put the pieces in and on the back of the photo you took earlier.
#8 - Give it to someone to put together, along with the little picture you took.
#8 - Start another one...........and above all, HAVE PHUN.
Carter
A note from Steve:
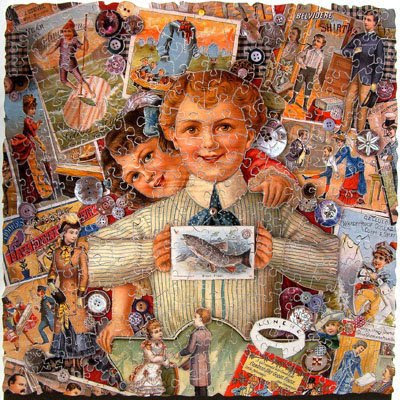
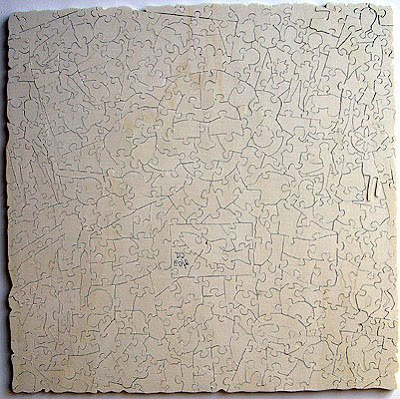
I wanted everyone to notice how Carter cuts along color lines. Look at the following puzzle. Notice the back of the puzzle. You can clearly see how he followed the color lines.
Carter has developed a style all his own. This is something to shoot for if you want to make puzzles.
Thanks again Carter for sharing you talent.


