 This portrait pattern design tutorial by Charles Dearing was recently posted in the Community Forum. It shows how Charlie designs is patterns from scratch with pencil and paper. If you are interested in designing this type of pattern and you want the most accurate detail then this is the best approach. Thanks Charlie.
Charles Dearing:
Well, pull up a chair 'cause here it is. You'll slap yourself and maybe me because it's that easy. I spent a lot of time writing out how it's done as best I could so bear with the look of commentary. It's cut and pasted:
"Huh? Layer what? Vector? Click what???" That's right. Making patterns on a computer can be confusing! I had to think of an easier way. I put my two brain cells together and here's what I do.
Find a picture in a magazine, on the internet, scanned on a scanner...anywhere (but respect copyrights). Print that picture out. Get a sheet of carbon paper and a clean sheet of white paper.
Place the printed out picture on top of carbon paper and then the clean sheet. Tape them all down to a flat smooth surface so they won't move. I use painter's tape so it won't tear up the paper.
This is the start of how to make your pattern, but let me explain how I do it.
In making a pattern, you have to know the premise of what makes a pattern cuttable. White is usually representative of what is to be kept in the cutting while gray or black usually represents what is to be cut out. For examples I use here, white is what to keep. Although my patterns are done on paper, they are colored in on a computer for your ease of seeing the areas to be cut out. When YOU make a pattern the way I do, you can put a colored dot or an x in each area to be cut out or just shade it in with a pencil. The eyes appreciate this more and it's less confusing when you glance at the pattern.
One thing we don't want in a pattern is what is referred to as "floaters". Floater is the term given to an area meant to be left in the pattern, yet it isn't connected to anything. All of the white areas have to be connected to other white areas. If they aren't then you'll have a picture that will fall apart when cut. When making a pattern you are basically tracing! It's more complex than mere tracing because you still have to take in mind what makes a pattern work, what makes a pattern appealing and what can destroy a pattern. All the while keeping in mind that you don't want floaters.
There is no law saying that you have to trace exactly what you see. If there are a lot of shadows then it is okay to break them up somewhat by tracing them in sections. In my patterns, shadows or dark colors are what I am tracing. This is open to your judgment on how much shadow you want to cut out while taking in mind that you cant shade with a pattern. It's either there or it isn't. This is unfortunate because I love to make realistic patterns. An example of this is someone with a hat on where the shadow is falling over their eyes and some other facial features. More often than not, I pretty much ignore that shadow so I can bring out the detail of the face.

My preference is to find large pictures because the bigger it is then the more detail you can see. Smaller pictures, even when enlarged can be blurry and only suggest certain details. Sure it may resemble the subject, but if you're going for realism then bigger is better. Keep in mind that no matter how big you make the pattern, you can always take it somewhere to be reduced in size for cutting. If you know you are going to do that then keep that in mind when making your pattern because what looks cuttable at one size may be too small when reduced.
Okay, now for the premise of making a cuttable area. Think of yourself as a bird. You're looking down at a shape from above. Let's say we want that shape to hold water. If there is a break in that shape's wall ...well, then you'll have water leaking out! Make sure the area you want to cut out is complete. Think of a simpler shape like a circle. It has no beginning and no end. It's enclosed. It'll hold water, therefore it can be cut out. Think of someone’s eye. You'll also notice that sometimes there is shadow (or just dark color) all the way around the eye. Well, that would make the colored portion of the eye a dreaded floater! That's one sacrifice we have to make is to not draw completely around that eye or it will fall out . Break it up a little. Trace the shadow/darkness in sections. When there is light shining off of the pupil of the eye, I usually connect that light to the nearest light colored area. You can also make that an intentional floater glued to the backer for more realism. Or put a small dot of white paint there. YOU are in charge of how much detail is in your pattern.
You don't have to trace every single shadow or dark area. If detail intimidates you, then be picky about what you want and don't want. Notice there are still some shadows and darkness not traced? Picking what you want in the pattern and what you don't. Occasionally you will also notice that there are hundreds of little dark spots!! You can basically do a broad area of them as one whole area to be cut out. Suggestion of detail can be just as effective as existing detail.
Detail can scare the heck out of some folks, but fear not my sawdust covered friends! Let's say you know all there is to know about how to follow a line with your blade on the scroll saw. BINGO! That's all you need to do! The ONLY difference between cutting out a simple pattern versus a detailed pattern is time. If you have the time and patience then you can cut any patterns! I am always out to challenge myself and most of that challenge is in my time because I want the finished product to look as realistic as possible when done. This is easier said than done if you have a deadline to get it done.
That's all?Huh Yes, folks, that's all there is to what I do to make a pattern. If after reading this, you still have questions...then feel free to ask.
Sunday, May 9, 2010
Portrait pattern technique by Charles Dearing.
Posted by Steve Good at 11:57:00 PM
60 Second Scroll Saw Tip - Breaking Information
Posted by Steve Good at 1:30:00 AM
Subscribe to:
Comments (Atom)
Seyco
Free Pattern Catalog. 1000's of free patterns.
Wooden Vases on the Scroll Saw Book $12 Each
Each digital book is available for download immediately after payment.
The books are $12 per edition and contains eight unique patterns each.
Watch the following video to see how easy these beautiful scroll saw vases
are to make.
Watch the following video to see how easy these beautiful scroll saw vases
are to make.
Order the $3 pdf Catalog
Stencil Printer Instruction Video.
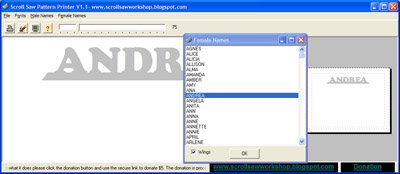
The Scrollsaw Workshop Stencil Printer 1.7 is my latest software for creating patterns. It will create key chain fobs, desk name plates and more. Click the image above to download the latest version. It is free to use donationware. This software is for Windows PC only.
Scroll Saw Pattern Printer update 1.1


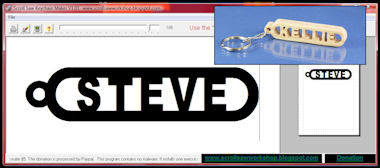
Scroll Saw Keychain Pattern Maker
 Use the Scroll Saw Keychain Maker to start a small keychain business. Build yourself a nice display and make up severl keychains with common names. Sell at craft shows, on Ebay or at work. Everyone needs a keychain. Take custom orders. Heck just make them and give them away as gifts. It's all made easy with the Scroll Saw Keychain Maker.
Watch the video demonstration then download the file below and get started with the fun.

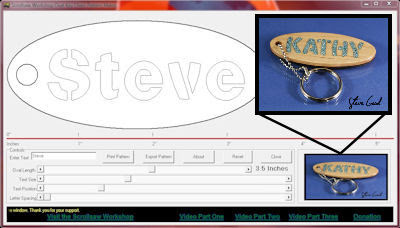
Download the Oval Keychain Pattern Maker.
Enjoy designing and printing these great personalized key chains. Give them as gifts, make them for fun or sell them at craft shows. It's easy, just watch the video demo then download and install the program. You will be designing these fun projects in minutes. Windows PC only.

Download Version .9a
Please consider a $5 donation for The Oval Key Chain Pattern Maker.


Philip Lowndes Noah's Arc Pattern Available. Watch the video below.

Think Safety
Remember to keep the safety of yourself and others in your work shop in your thoughts at all times. Always wear eye and ear protection. Follow all the manufactures warnings that came with your power tools. If I demonstrate something on this web site that you don't feel is safe, don't do it. Your safety is your responsibility. Fingers are handy things, try to keep all of them.
__________________________
__________________________
The Scrollsaw Workshop Blog is in no way affiliated with or sponsored by Scroll Saw Woodworking and Crafts Magazine formerly (Scroll Saw Workshop Magazine) or it's publisher Fox Chapel Publishing.
Scroll Saw Woodworking and Crafts


